">%0A<path id="Background" d="M0 35.2C0 22.8788 0 16.7183 2.39786 12.0122C4.50707 7.87264 7.87264 4.50707 12.0122 2.39786C16.7183 0 22.8788 0 35.2 0H64.8C77.1212 0 83.2817 0 87.9878 2.39786C92.1274 4.50707 95.4929 7.87264 97.6021 12.0122C100 16.7183 100 22.8788 100 35.2V64.8C100 77.1212 100 83.2817 97.6021 87.9878C95.4929 92.1274 92.1274 95.4929 87.9878 97.6021C83.2817 100 77.1212 100 64.8 100H35.2C22.8788 100 16.7183 100 12.0122 97.6021C7.87264 95.4929 4.50707 92.1274 2.39786 87.9878C0 83.2817 0 77.1212 0 64.8V35.2Z" fill="%23FFFC00"/>%0A<g id="Union">%0A<path d="M48.8333 20.4466C50.8166 20.4466 52.7532 20.6368 54.6299 20.9967C56.0599 21.2734 56.8799 22.7333 56.5033 24.14C56.1166 25.5766 54.6268 26.4033 53.1602 26.1501C51.7535 25.9067 50.31 25.7799 48.8333 25.7799C34.9333 25.7799 23.6667 37.0466 23.6667 50.9466C23.6667 64.8466 34.9333 76.1133 48.8333 76.1133C62.7333 76.1133 74 64.8466 74 50.9466C74 49.6067 73.8967 48.2934 73.6934 47.0101C73.4634 45.5534 74.2935 44.09 75.7168 43.71C77.1401 43.33 78.6135 44.1735 78.8701 45.6201C79.1734 47.3501 79.3333 49.13 79.3333 50.9466C79.3333 67.7899 65.6767 81.4466 48.8333 81.4466C31.99 81.4466 18.3333 67.7933 18.3333 50.9466C18.3334 34.1 31.99 20.4466 48.8333 20.4466Z" fill="black"/>%0A<path d="M58.7334 54.0667C59.3434 54.0668 59.8333 54.5001 59.8333 55.0534C59.8333 60.4967 54.92 64.9066 48.8333 64.9066C42.7467 64.9066 37.8334 60.4967 37.8333 55.0534C37.8333 54.5001 38.3233 54.0668 38.9333 54.0667H58.7334Z" fill="black"/>%0A<path d="M42.11 40.5732C44.97 40.5733 46.3867 43.8468 46.3867 46.8835C46.3867 48.28 46.19 49.0032 45.5801 49.0033C45.3567 49.0033 45.0834 48.7199 44.7334 48.3633C44.1267 47.74 43.29 46.8835 42.11 46.8835C40.93 46.8835 40.0967 47.7399 39.4867 48.3633C39.1367 48.7199 38.8633 49.0033 38.64 49.0033C38.0034 49.0032 37.8333 48.2567 37.8333 46.8835C37.8333 43.8501 39.25 40.5732 42.11 40.5732Z" fill="black"/>%0A<path d="M55.5534 40.5732C58.4134 40.5733 59.8301 43.8468 59.8301 46.8835C59.8301 48.28 59.6333 49.0032 59.0234 49.0033C58.8001 49.0033 58.5267 48.7199 58.1768 48.3633C57.5701 47.74 56.7334 46.8835 55.5534 46.8835C54.3734 46.8835 53.54 47.7399 52.93 48.3633C52.58 48.7199 52.3067 49.0033 52.0833 49.0033C51.4467 49.0033 51.2767 48.2567 51.2767 46.8835C51.2767 43.8501 52.6934 40.5732 55.5534 40.5732Z" fill="black"/>%0A<path d="M69.4004 19.0801C69.8437 18.0801 71.2604 18.0801 71.6771 19.0801L74.0104 25.1602C74.1504 25.5501 74.4538 25.8268 74.8171 25.9668L80.9004 28.3268C81.9003 28.7702 81.9004 30.1865 80.9004 30.6032L74.8171 32.9365C74.4571 33.0765 74.1504 33.3802 74.0104 33.7435L71.6771 39.8232C71.2338 40.8232 69.8171 40.8232 69.4004 39.8232L67.0671 33.7435C66.9271 33.3835 66.6238 33.0765 66.2604 32.9365L60.1771 30.6032C59.1772 30.1598 59.1772 28.7435 60.1771 28.3268L66.2604 25.9668C66.6204 25.8268 66.927 25.5234 67.0671 25.1602L69.4004 19.0801Z" fill="black"/>%0A</g>%0A</g>%0A<defs>%0A<clipPath id="clip0_35_17">%0A<rect width="100" height="100" fill="white"/>%0A</clipPath>%0A</defs>%0A</svg>%0A)

Make a Lens that edits any photo
AI Edits takes one written edit and builds a Lens that applies it to whatever photo someone takes. You are not editing your own picture, you are writing the instruction that gets applied to theirs.
Open the Gen AI suite at /assets. AI Edits leads the grid, on the card that reads Describe the edit you want — a new style, a new place, a new look — and AI Edits builds a Lens that applies it to any photo, and Try Now opens it. There is a second way in at /ai-edits, which puts the same box on a page of its own.
Read the header before you type, because it is the part people get backwards. Edit Any Photo With One Prompt is what the tool does, and the line under it says who the photo belongs to: Describe one edit — your Lens applies it to any photo a Snapchatter takes. The line beside the icon is what it costs you, an Average Processing Time: 15 seconds.
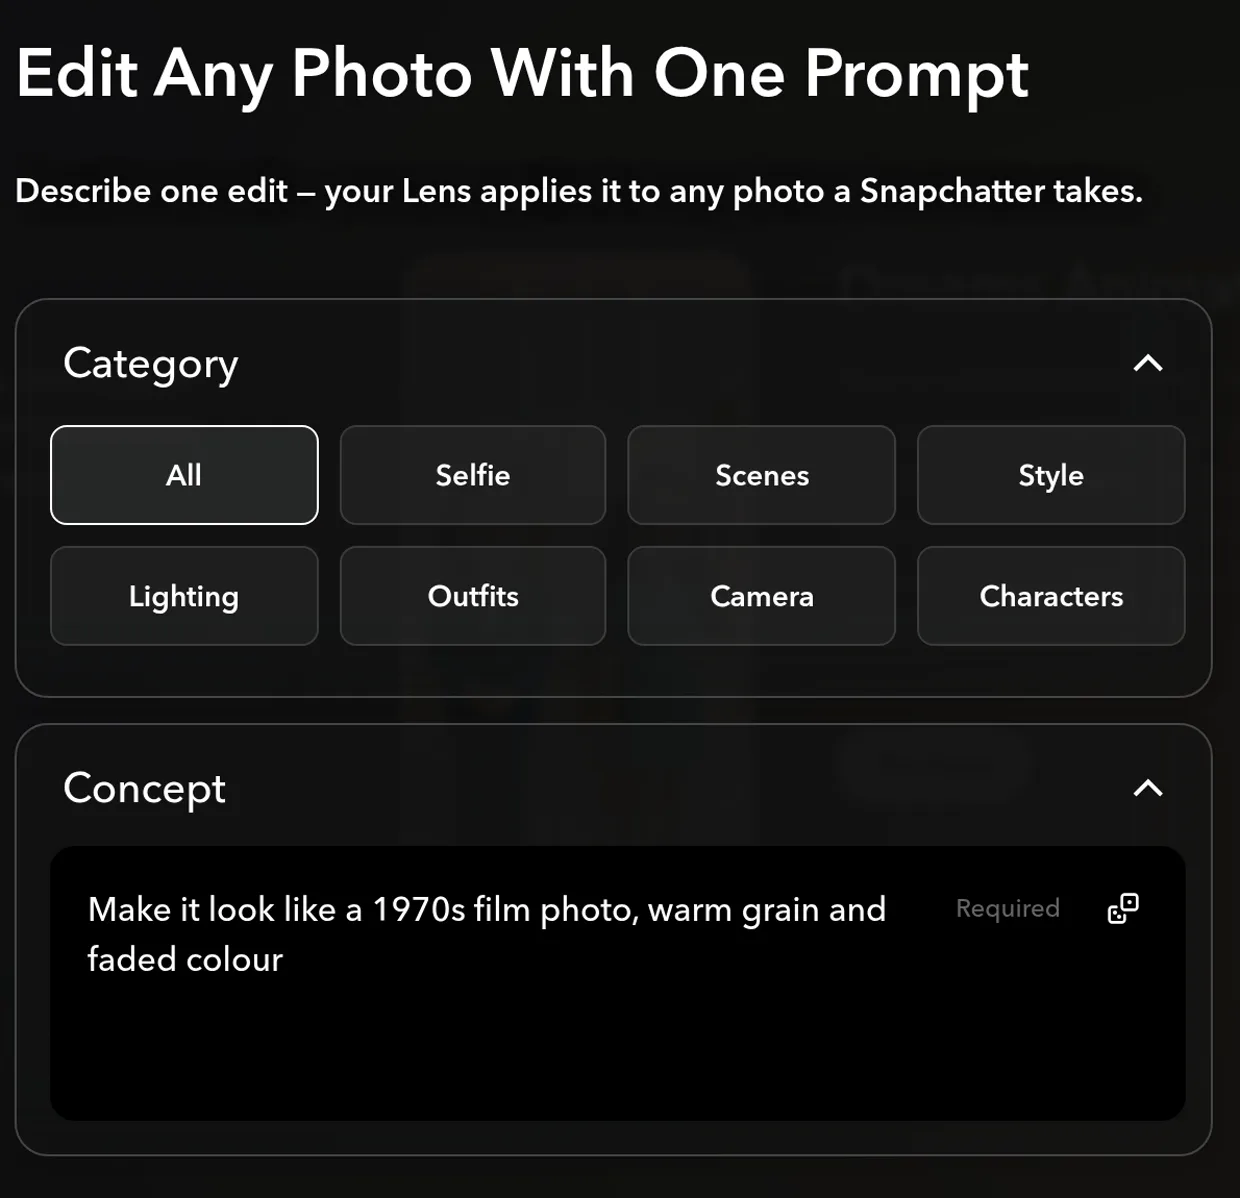
Pick a Category before you write anything. All is what you land on, and the seven beside it — Selfie, Scenes, Style, Lighting, Outfits, Camera, Characters — each swap the five previews under the box for that kind of edit. The five you can see are the start of a much longer list, so Shuffle Concept keeps dealing new ones from whichever category you are on rather than cycling those five.
Use /ai-edits if you are not sure which category your idea is. The same seven run along that page under One prompt box, every kind of edit, and each one comes with a line saying what it is for — Selfie is Keep the photo, change the look — a new cut, a new colour, or full-on makeup — with worked examples under it and a Try this on each that carries the prompt straight into the box.

Write one edit in Concept, which is the only thing the tool requires. It asks you to Describe the edit — a new style, outfit, lighting, or scene, and one edit is the unit: "Make it look like a 1970s film photo, warm grain and faded colour." A concept that asks for four unrelated changes at once gives the model nothing to hold constant, and holding the rest of the photo constant is the whole trick.
Read the line along the bottom before you build. It prints the sentence that actually gets sent, Create a Lens using AI Edits of… with your concept on the end. If that sentence does not describe the edit in your head, fix the concept rather than the Lens.

Tap Create My Lens, then change one thing per message. The page's own worked example is three messages rather than one: "make ai edits lens to make me an ogre", then "give the ogre a cute pink sparkly armor with little toys & details", then "ogre face is too serious now, make it more cute and add blush". Each message keeps what you did not mention.
Tap Publish when the edit is right, and review the name, icon and description Easy Lens writes before you submit. Once it is live, anyone can try that edit on their own photo, which is the thing you were actually building.
You have a Lens that applies one described edit to whoever opens it, and you know to fix the concept rather than the Lens when the sentence at the bottom is wrong.